
We knew that, over time, our projects would show up in some pretty unique places but we never thought of this!
Mr. S has already earned his "Weekend CNC Warrior Approved" post with some very nice work but this project is over the top.
"I perused your project shop a couple of weeks ago and ended up buying several of your projects, including Western Saloon No. 1. When I saw the bull skull I immediately thought of beer."
OK Mr.S your going to need to tell us more then that...
"When I saw the bull skull I immediately thought of bleached bones and my Pale Rider Ale. So, I just couldn't resist making an ale glass incorporating the bull skull from your Western Saloon No.1 mini-project with elements from my beer label. The ale glass is not functional, it is decorative only."
Turns out Mr. S is a "all-grain" home-brewer and has been doing it for years. One of his beer creations is a Belgium Wit that he calls "Pale Rider".
"Pale Rider will conjure up in their minds the Western movie called Pale Rider starring Clint Eastwood, and it did for me as well.
" For each beer I make I have created a unique label and had them copyrighted, and so for my Pale Rider Ale my label is in the Old West tradition; a copy of the label is attached. I did my best to put some sort of description on each label; for Pale Rider Ale it goes as follows:
When the dusty trail of life leaves you as parched as bleached bones,
quench your thirst with a Pale Rider. And next time, blaze your own trail;
saddle up with a six-pack and head for the sunset…………"
Mr. S took the time to send us some great information on how he pulled this off.
"I used Aspire 8.0
- The ale glass was carved from a solid one-piece maple turning square blank.
- The turning square was first put on a wood lathe to cut a tenon to fit the chuck on the CNC indexer rotary axis; and also to create lathe headstock & tailstock centers on the wood blank for later use to sand the outside of the glass.
- The CNC machine used is a Shopbot.
Bits used:
- ½” endmill used to round the turning square.
- ½” endmill used to create a tenon that allowed attachment to a wood lathe chuck for hollowing, sanding inside the glass, and finishing.
- ½” endmill used for the 3D roughing pass.
- 1/8” tapered ballnose for the 3D finishing passes (I did two passes).
- 1/16” tapered ballnose for a 3D finishing pass just around the bull skull to get some finer detail; a boundary box created around the bull skull perimeter constrained the bit to only finish cut the skull.
- 60 degree v-bit for the text.
- 18 degree engraving v-bit for the cowboys’ silhouettes.
Text and silhouettes highlighted with Minwax mahogany stain.
The glass was put on a wood lathe between centers and the exterior was carefully sanded to 600 grit before hollowing.
After hollowing on a wood lathe using a steady-rest for support, the glass interior was sanded.
I love the look of natural wood, so I applied 3 coats of General Finish Gel Topcoat wipe on urethane satin finish, on the exterior & interior of the ale glass."
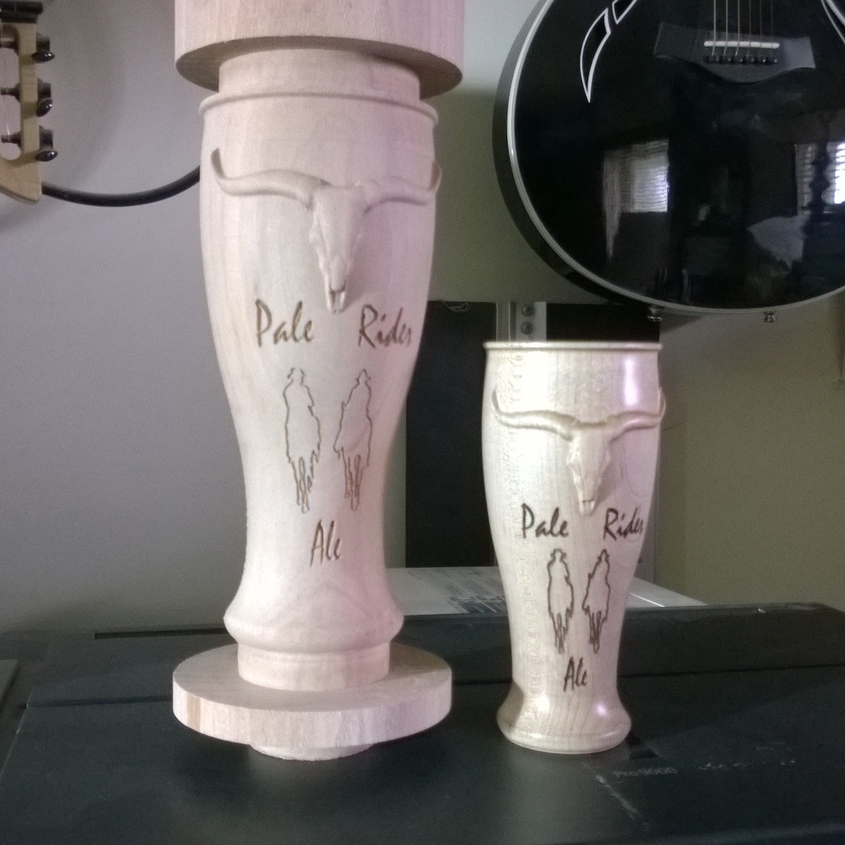


"I’ve also attached the “new” “improved” version I just took off the CNC an hour ago; still has a lot of work to do on a wood lathe to hollow, highlight the cowboy silhouettes & text with stain, sand and apply finish top coats.
This latest rendition uses my original glass profile design which is much larger and has more curvature to it. This one is made from a solid one-piece 4” sycamore turning square. I plan on having a local glass blower make an insert for it; the only way that assures not contamination of the wood or the beer."
We have to say the thought, process and finish of these glasses is pretty top drawer! Mr. S you have out done yourself and we sure hope you are enjoying some of your home-brew in those pretty soon.
"Saloons and beer just go together. Of course, if you’re a home-brewer the saloon is right in your own back yard (smile).
My thanks to the Design&Make team for absolutely wonderful mini-projects."
Thank you Mr. S, for again, taking the time to send in the pictures of your hard work and for the included text for us to share!
Be safe and let the chips fly!
The CNCminiProjects Team