Weekend CNC Warriors are at it again!


We always enjoy receiving Weekend CNC Warrior submissions and we REALLY enjoy getting them from our already "approved" Weekend CNC Warriors.   It really shows the excitement they have in using our projects over and over again.  Thanks to Tom, Suzanne, Keith and Uncle Henry for submitting these projects to help inspire and keep the creative juices going!


Tom Watson
(Watson's Wooden Words)

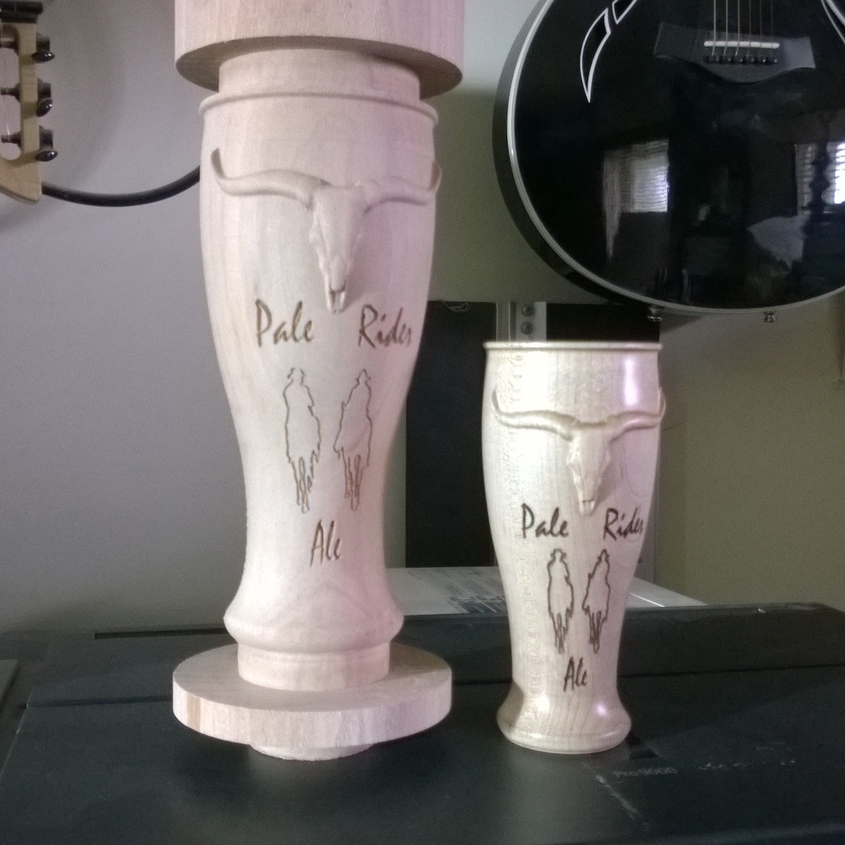
"Here is a recent carving from the Pop’s tool shop. It is carved in 1 ½” western red cedar."

"It was painted with blended FolkArt paint. Carved on my The Pilot Pro CNC using Vectric Aspire software."

Tom used Pop's Tool Shop No.1 to create this beautifully finished layout and what a great saying!


Tom sent us this shortly after last years Vectric User Group Meeting.  Great work Tom!  We hope to see you again this year at the 2015 event!

Tom used our Halloween No.2 project for this layout.


Tom had a busy Christmas, last year, making trivet candle holders.  

With a finished piece looking like this you can see why.  

Tom used the Home for the Holidays No.2 project to create these festive candle holders.

If you are interested in Tom's other projects check out his official Shop Notes post where you can see more of his work and find out more about Watson's Wooden Words.


Suzanne Ramsey
(Suzanne's Woodworking)

What a great holiday decoration created using the Toy Soldier from the Home for the Holidays No.1 project!

Candle holder centerpiece hack using the Home for the Holidays No.2 project!

Suzanne has a knack for coming up with some pretty impressive layouts using our projects.

She has a great eye when it comes to hacking together some of our models with models in her library. 

Raw part just before Suzanne adds the finish.

Interested in other Weekend CNC Warrior projects Suzanne made or how to find her on the internet?

Check out her official Shop Notes post for all kinds of inspiration and other great information about Suzanne's Wood Working.

Another great hack using models from the Home for the Holidays No.1 and what a great finish!


Keith Geiger

This is a great hack from Keith.  He used the plaque shape from the Pick-Up League Basketball project and added some raised text and a logo. If you look close you can see he incorporated in a mustang car model he picked up from Vector Art 3D. 

Great work Keith!

For more of what Keith has been doing with our projects check out his official Shop Notes post.

Super job!


Uncle Henry

Rendering in Aspire

Finished Piece - NICE!

"Here is the plaque I made for my nephew. He is planning on going to study movie making in college."

Uncle Henry came up with a great layout using our Home Cinema No.1 project.  We're thinking his nephew was pretty impressed with the finished piece!

Interested in what other projects Uncle Henry has created?  Check out his official Shop Notes post for some great inspiration and information! 


Thank you to all of our Weekend CNC Warriors that keep sending in the fantastic pictures of their projects!  We appreciate all of the support and its work like yours that really shows off our projects, the power of a CNC through good craftsmanship, imagination and passion!


Get yourself officially Weekend CNC Warrior Approved... you know you deserve it!

Post it in the Vectric User Forum under Vector Art 3D / Design and Make It - Gallery or Email us an image of a project you made that uses one of our projects and a short description (try to include software used, the CNC ,finishing process and a social link... don't forget your name).  

When it gets posted we will be sure to let you know!!!!


Be safe and let the chips fly!

The Design and Make/CNCProjects Team

Mr S and his Ale Glasses


We knew that, over time, our projects would show up in some pretty unique places but we never thought of this!

Mr. S has already earned his "Weekend CNC Warrior Approved" post with some very nice work but this project is over the top.

"I perused your project shop a couple of weeks ago and ended up buying several of your projects, including Western Saloon No. 1. When I saw the bull skull I immediately thought of beer."

OK Mr.S your going to need to tell us more then that...

"When I saw the bull skull I immediately thought of bleached bones and my Pale Rider Ale. So, I just couldn't resist making an ale glass incorporating the bull skull from your Western Saloon No.1 mini-project with elements from my beer label. The ale glass is not functional, it is decorative only."

Turns out Mr. S is a "all-grain" home-brewer and has been doing it for years.  One of his beer creations is a Belgium Wit that he calls "Pale Rider".


"Pale Rider will conjure up in their minds the Western movie called Pale Rider starring Clint Eastwood, and it did for me as well.

" For each beer I make I have created a unique label and had them copyrighted, and so for my Pale Rider Ale my label is in the Old West tradition; a copy of the label is attached. I did my best to put some sort of description on each label; for Pale Rider Ale it goes as follows:

When the dusty trail of life leaves you as parched as bleached bones,
quench your thirst with a Pale Rider. And next time, blaze your own trail;
saddle up with a six-pack and head for the sunset…………"

Mr. S took the time to send us some great information on how he pulled this off.  

"I used Aspire 8.0

  • The ale glass was carved from a solid one-piece maple turning square blank.
  • The turning square was first put on a wood lathe to cut a tenon to fit the chuck on the CNC indexer rotary axis; and also to create lathe headstock & tailstock centers on the wood blank for later use to sand the outside of the glass.
  • The CNC machine used is a Shopbot.

 Bits used:

  • ½” endmill used to round the turning square.
  • ½” endmill used to create a tenon that allowed attachment to a wood lathe chuck for hollowing, sanding inside the glass, and finishing.
  • ½” endmill used for the 3D roughing pass.
  • 1/8” tapered ballnose for the 3D finishing passes (I did two passes).
  • 1/16” tapered ballnose for a 3D finishing pass just around the bull skull to get some finer detail; a boundary box created around the bull skull perimeter constrained the bit to only finish cut the skull.
  • 60 degree v-bit for the text.
  • 18 degree engraving v-bit for the cowboys’ silhouettes.

Text and silhouettes highlighted with Minwax mahogany stain.

The glass was put on a wood lathe between centers and the exterior was carefully sanded to 600 grit before hollowing.

After hollowing on a wood lathe using a steady-rest for support, the glass interior was sanded.

I love the look of natural wood, so I applied 3 coats of General Finish Gel Topcoat wipe on urethane satin finish, on the exterior & interior of the ale glass."

"I’ve also attached the “new” “improved” version I just took off the CNC an hour ago; still has a lot of work to do on a wood lathe to hollow, highlight the cowboy silhouettes & text with stain, sand and apply finish top coats.

This latest rendition uses my original glass profile design which is much larger and has more curvature to it. This one is made from a solid one-piece 4” sycamore turning square. I plan on having a local glass blower make an insert for it; the only way that assures not contamination of the wood or the beer."

We have to say the thought, process and finish of these glasses is pretty top drawer!  Mr. S you have out done yourself and we sure hope you are enjoying some of your home-brew in those pretty soon.

"Saloons and beer just go together. Of course, if you’re a home-brewer the saloon is right in your own back yard (smile). 
My thanks to the Design&Make team for absolutely wonderful mini-projects."

Thank you Mr. S, for again, taking the time to send in the pictures of your hard work and for the included text for us to share!


Be safe and let the chips fly!

The CNCminiProjects Team

Don Harding - "Weekend CNC Warrior" Approved!


Don was pretty new to CNC'ing when he first started collecting up our projects.  At first he didn't even have a working machine set up but he could see the potential in using our projects to help him learn how to use his software and machines.  We are sure you'll agree, after reading this post, he has come a very long way... and he looks to be having FUN!

"Aspire Program and CNC mini projects/Design Make has changed my World.

HAVING TOO MUCH FUN FOR AN OLD MAN."

Don has been a member of his local fab lab and wanted to make a sign to show them how important their lab has been to his learning.  He used the Pop's Tool Shop No.2 to create this inspiring sign for the lab! 

Don has been busy making these heart and ribbon signs using the free Getting Started Heart and Ribbon project and adding a bit of V-Carving.  

The image on the left shows Don's machine working through the material left from the roughing pass.  After the finishing pass was compete he adds on the V-Carved text.

The onesie on the left was CNC'ed using his Legacy Arty 58 CNC.  Don had this to say about the one on the right:

"This Onesie was done on my Camaster Stinger I. Exciting to see this machine behave. I wish I had been introduced to the World of CNC'ing years ago."

Both turned out pretty nice!  We're sure the parents of Kadence and Emma will be very happy with their keepsake that is sure to last for a very long time!  The onesie model is part of our Nusery Fun No.1 project.

Don made this plaque for a local baker using the Chef's Kitchen No.1.  On the left is the finished part right off the machine and the picture on the right is the finished piece he delivered.

"Everything came out real Good.  Yesterday I got a Hug and later I got a Muffin.
 Carmella was THRILLED with the plaque."

Don used the included assembled layout from the Western Saloon No.3 project to make the sign for his room, while the sign on the left was laid out using the Pop's Tool Shop No.1 and Aspire.  He sure pull off a lot of depth in that one by overlapping the ribbon over the tools!

He was thinking outside of the box when he created the camping sign in the middle.  Don used dowels to hold the plank ribbon and plank sign, from the Pops Tool Shop No.2, together making it very stable.  We were hoping someone might think of that and send us a picture... Thanks Don! 

Our post would not be complete without a picture of the' "girls"... his Stinger and his Legacy CNC machines!  Those are two fine looking ladies you have there Don!


Stamp-WeekendCNCWarriorApproved.png

Don thanks for taking the time to send in all of these great pictures of your projects!

Consider yourself...  Weekend CNC Warrior Approved!


Be safe and let the chips fly!

The CNCminiProjects Team